Getting Started
This guide provides step-by-step instructions to help you set up your Connectivity Control Calibration (C3) device and integrate it with your 3D printer. By following this process, you’ll be able to remotely control your printer and perform calibrations through our CaaSUI dashboard.
Step 1: Create an Account
To get started, visit the CaaSUI website and create an account:
- Click on the Create Account tab.
- Enter your details, including your email address and a secure password.
- Verify your email address by entering the confirmation code sent to your inbox.
Once your account is created, you can log in to access the dashboard.
Step 2: Power On Your C3 Device
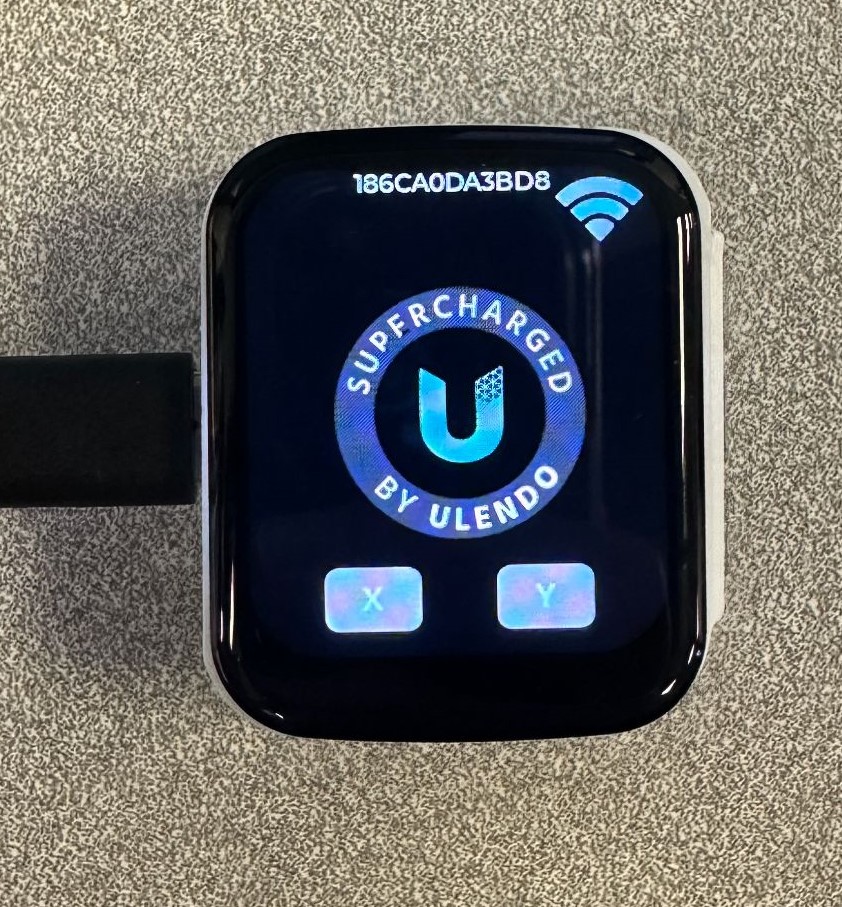
Unbox your C3 device and connect it to a power source using the provided cable and USB-C adapter. The device will automatically power on, and the built-in screen will display the Chip ID and a status message indicating it’s ready for setup.
Make sure the device is placed near a stable Wi-Fi connection for seamless operation.
Step 3: Connect your C3 device to WiFi
To connect your C3 device to the internet, follow these steps:
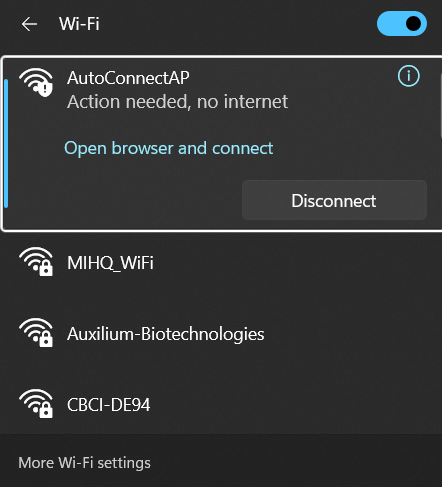
- Device Wi-Fi Access Point: Once powered on, your C3 device will automatically create its own Wi-Fi network. The network name will appear on your computer or smartphone’s Wi-Fi settings (e.g., AutoConnectAP).
- Connect to the Device’s Network: On your computer or smartphone, go to the Wi-Fi settings and connect to the AutoConnectAP network.
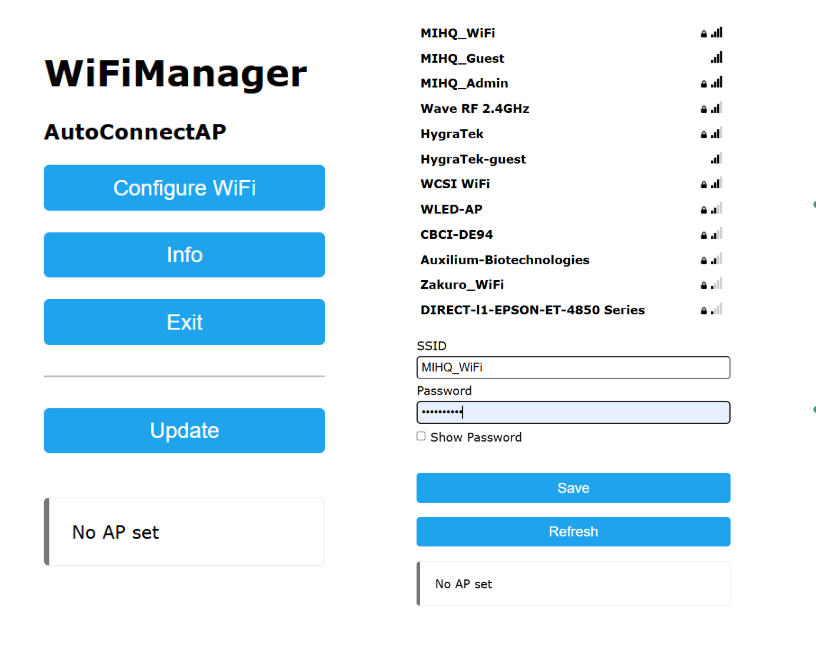
- Access the Wi-Fi Manager: After successfully connecting to the device’s Wi-Fi, your browser will automatically open the Wi-Fi Manager page. If this doesn’t happen, open your browser manually and navigate to
http://192.168.4.1. - Choose Your Wi-Fi Network: On the Wi-Fi Manager page, you will see a list of available Wi-Fi networks. Select your desired network and enter the Wi-Fi network credentials (SSID and password).
- Save and Connect: After entering the correct network details, click Save to establish the connection. The C3 device will attempt to connect to the Wi-Fi network. Once successful, the home screen on the device will display a Wi-Fi Connected icon indicator.
- Confirm Connection: Your C3 device will now be connected to your Wi-Fi network, and you can proceed with device registration in the next step.

For optimal performance, ensure your device is within the range of a stable Wi-Fi signal. If you experience any connection issues, try moving the device closer to your router or use a Wi-Fi extender.
Step 4: Add Your Device to the Dashboard
Integrate your C3 device with your account by following these steps:
- Log in to your dashboard at CaaSUI.
- Navigate to the Inventory section and click on the Add Device button.
- Enter your 3D printer’s name, make, model, and most importantly the Chip ID displayed on the screen of your C3 device.
- Click Submit to register your device.
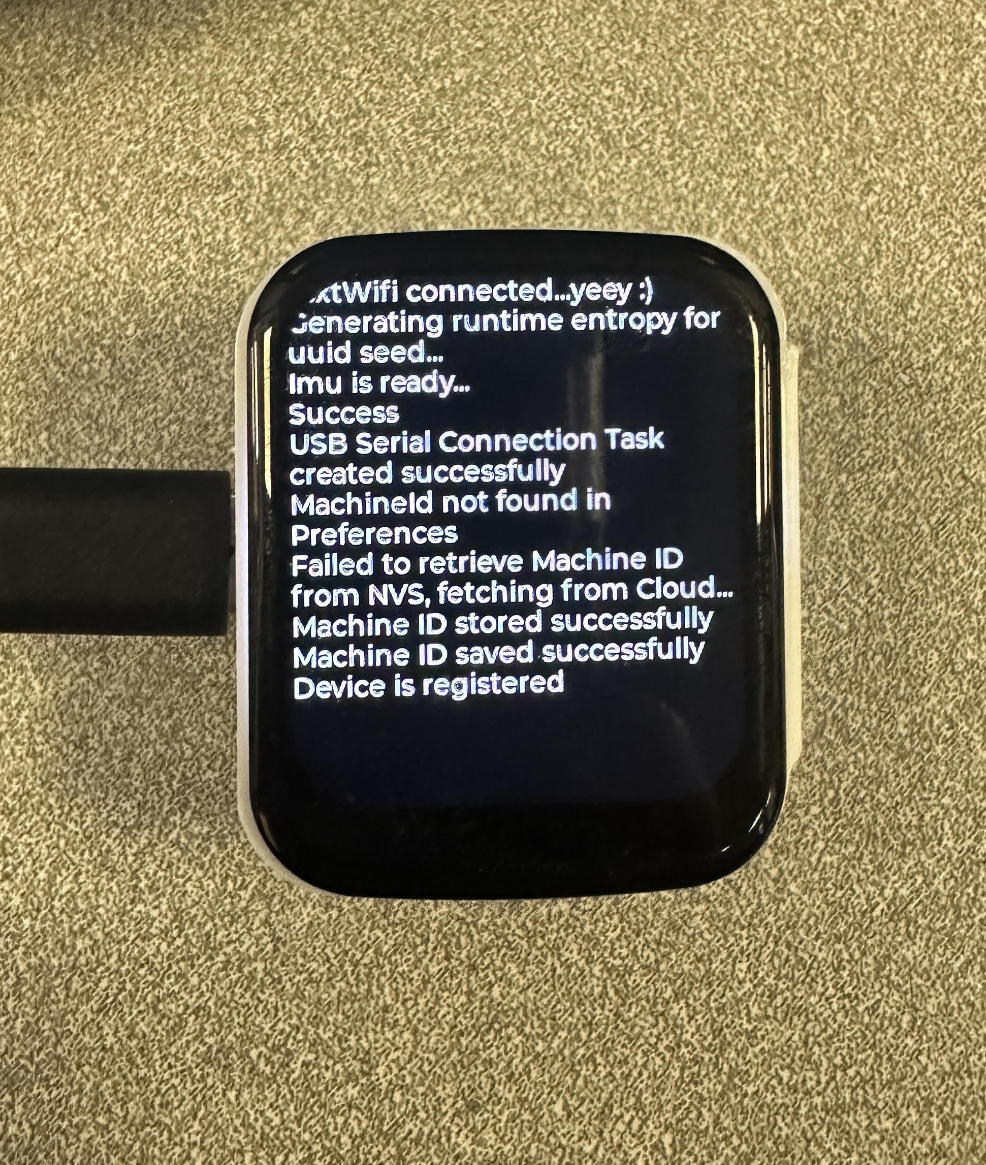
- Restart your C3 device by pressing the reset button (lowest button).
Swiping to the left screen on your C3 device, you will see a message indicating that the device is registered. If the device is successfully registered, it will appear in your device list with its current status and controls.

Step 5: Begin Using Your C3 Device
Once added, your C3 device is ready for use. Through the dashboard, you can:
- Monitor and control your printer remotely:
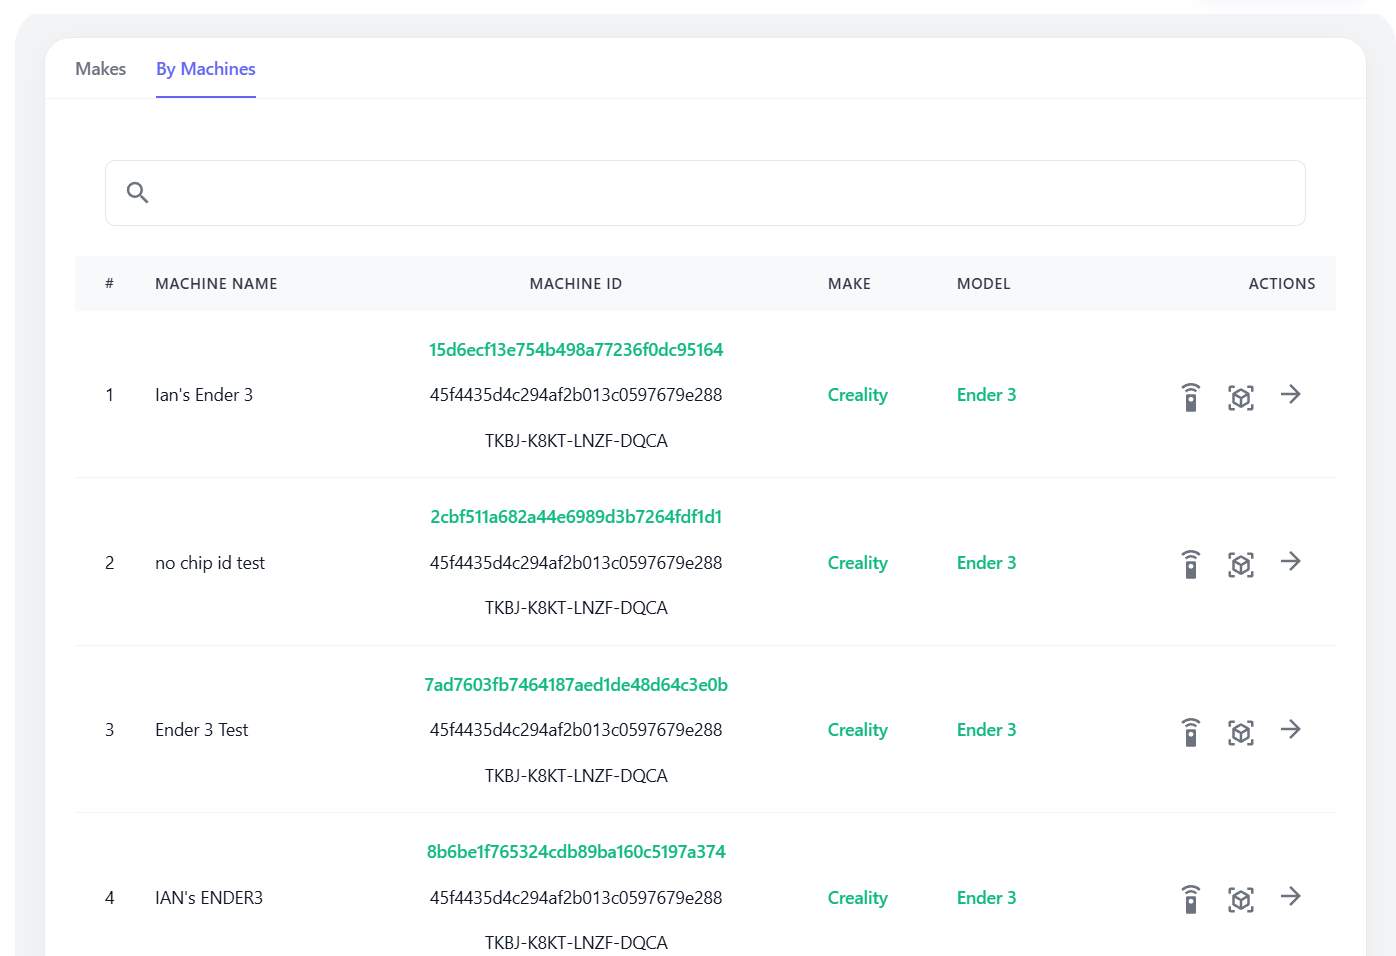
- Navigate to the Inventory section and click on the By Machines tab.
- Locate the machine that is registered by identifying the name given to the 3D printer, and click on the remote control button under the Actions column.
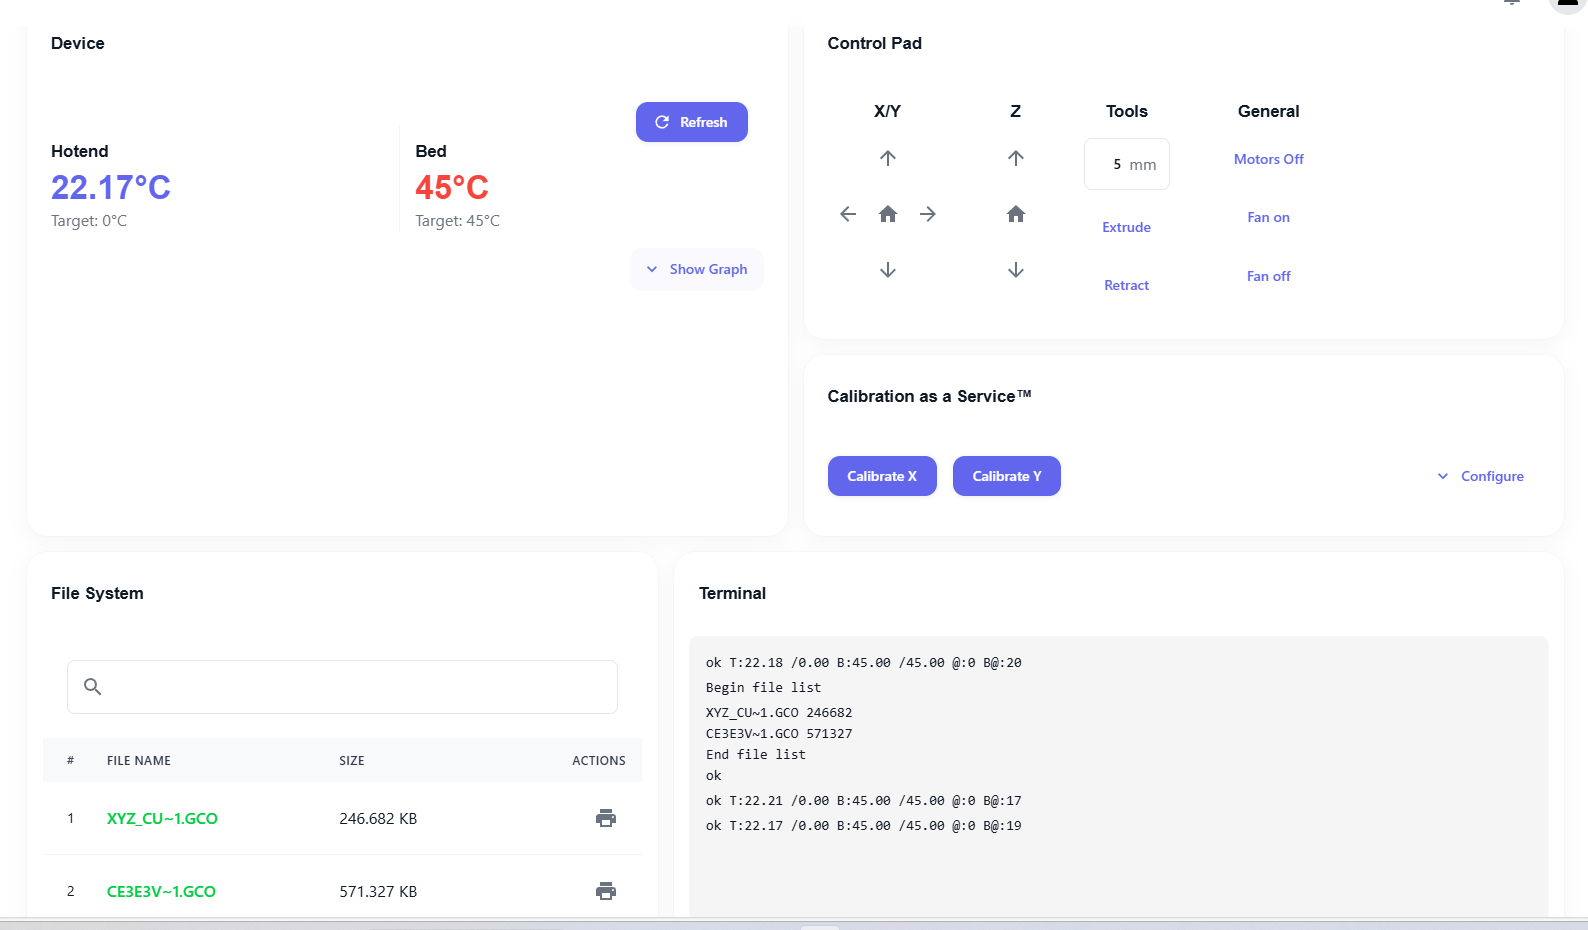
- You will be greeted by the controls page where you can start remotely controlling your 3D printer.
- Start calibration routines or prints.
- Analyze performance data collected during operation.
Ensure your printer is free of obstacles before starting any movement or calibration commands. Follow the safety guidelines provided in the user manual.
Troubleshooting
If you encounter issues during setup, refer to the Troubleshooting Guide or contact our support team for assistance.